Easy Toy Box Plans
Good... I'm glad we're like minded and looking for toy box plans otherwise we'd be searching for plastic box plans. There's just no feeling in that, no creativity, no emotion in having accomplished anything.
And when your child grows you won't have any pleasure in saying " I bought that plasic box especially for you."
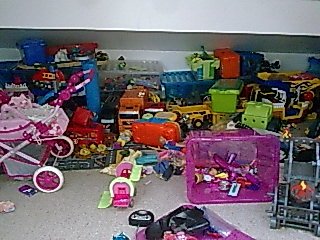
 My granchildren’s jumble of toys
For an individual toy box plan at only a small cost and inclusive of lumber specs and suggestions and cutting sizes follow this link to obtain your Personalized ToyBox
Aternatively and this is again from my favourite supplier click on this link to Toybox Plans
What could be better than saying "Yes I made the toy box for you. It took rather a lot of time, plenty of patience, two trips out for materials, lots of sweat and tears, a cut that required 3 stitches and loads of toy box plans"
Well perhaps not but you get my drift. You have given love and effort and will be rewarded for that, if only by a smile which will be enough.
Planning and Materials.
The Alternative to Buying Plans
I am presuming you have no specialist tools such as a router or miter saw and so we are going to follow the 90 degree route with butt joints. Don't worry though our box will be perfect.
When buying wood, if you ask for "2" x "1", that would be the size before planing ie rough sawn. After planing to get the required smooth finish we need, it will finish a little less so I cannot calculate the exact cutting sizes.
The easiest method is to describe what to do, so here goes.
Plywood front, back, sides, top and bottom. Toy box plans average sizes are 36" wide, 18" high and 18" deep and assuming yours will be approx the same you will require the following :
front and back. 2 @ 36" x 18" x ½”.
sides 2 @ 18" x 18" x ½”.
base 1 @ 35" x 18" x ½”.
top 1 @ 36" x 19" x ½” Cut this one slightly smaller to allow for positioning later
I won't be so precise with the wood to fit to the top, bottom and lid because of the uncertainty of wood sizes, but the finish will be exact and I will refer to these pieces as 2" x 1" and 1" x ½”
12 @ 40" x 2" x 1"
12 @ 40" x 1" x ½”
12 @ 20" x 2" x 1"
12 @ 20" x 1" x ½” This will be cut to size once the box is made.
Corners. 4 @ 18" x 1" 90 degree corners,
Make That Box
Stand the side 18" x 18" ply at 90 degrees against a wall, glue and pin with 5 x 30mm pins the front to it. Repeat to form 3 joined sections. Turn 180 degrees and fix the back. You now have a box.
Measure corner to corner and the opposite corner to corner and adjust till both are the same
At the top and bottom of the box we are making the wood 'U' sections next to slot into the ply.
Length of the box first.
Cut a 2"x 1" to the inside measurement of the box, glue and pin this to the 1" x ½” keeping the spaces at either end equal. Attach the second 2" x 1" to the 1" x ½”.
You should now have a groove. Slot it over the ply.
Make 3 more exactly the same and position the top one.
Cut the side pieces individually, then fix together and slot 2 to the top.
Cut off the overhanging pieces with a panel saw.
Turn everything upside down, drop the base ply into the box and repeat the procedure.
Lid
Sandwich the 1" x ½” between 2 @ 2"x1" and place along two edges of the ply.
Rest on the box keeping outer edges of the wood flush.
Individually cut the end pieces. This time you will notice that the 1" x ½” interlocks within the groove of the front and back pieces.
Leave for the glue to set before trimming the edges.
Measure and glue to the 4 corners the covering 90 degree angled pieces.
Play That Tune
Usually with these types of toy box plans, a piano hinge is used, which is a long length of hinge. Cut to the whole length with a junior hacksaw and screw 1 side to the lid first. Borrow a pair of hands to support the lid when screwing to the box. Buy the screws at the same time as the hinge ensuring they will be flush within their countersunk holes or slightly deeper.
Beware Opening Lids
Kids have a habit of trapping their tiny fingers, no matter how many times we tell them of the dangers.
Anything that opens or shuts they will investigate.
I will advise therefore to include in your toy box plans, that you buy 'soft closers' for the lid which ease the lid down softly.
Return to Wood Working Plans for more Plans
From Toy Box Plans Return to Woodworking


 My granchildren’s jumble of toys
